How to make your very own multicolored cake :)
Supplies:
- 2 white cake mixes
- Food coloring
- 16 oz bag of mall Marshmallows
- 1 teaspoon of vanilla
- 4 tablespoons of water
- 2lbs of powdered sugar
- Butter

|
- Follow the mixing
directions on your cake mix box. The cake MUST be a WHITE cake. I
learned this the hard way by using a yellow cake mix the first time, it
tinted all the colors.
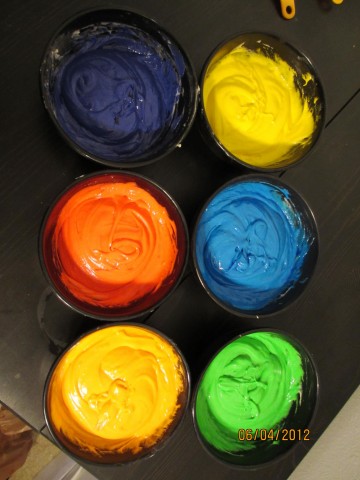
- Separate the batter into 6 bowls (change the number to match the number of different colors you have)
- Use your food coloring to make your colors
| |
|
|
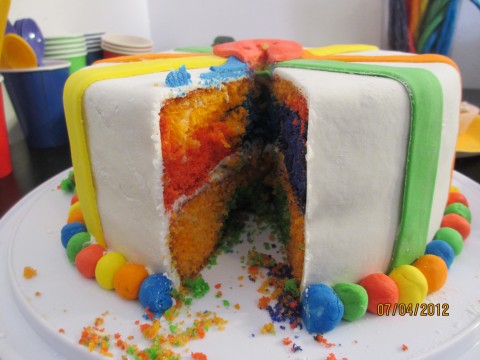
4. Randomly plop each color into a sprayed and floured cake tin until you have used about half of your cake batter. Note, you do NOT need to swirl the batter around to get the rainbow effect.
5. Do the same with the rest of your batter in a second tin. Bake as directed.
6. Whilst your cake is cooking/cooling you can work on your fondant. Empty the whole bag of marshmallows into a microwave safe bowl. Add the water and vanilla. Start by putting it in the microwave for 1 minute. Then mix the marshmallows, you will want to heat and mix until you end up with a gooey, sticky mess. Cover your hands in butter and start mixing in the powdered sugar. This isn't easy to make so you will have to be patient. Keep adding the sugar until you get the right consistency (a little tougher than play-dough).
7. If you are adding different colors you will want to divide the marshmallow goo and add the dye before you add the powdered sugar.
8. Once your cake is cooled, frost away and start decorating. Save a little frosting for later.
9. COVER your counter in powdered sugar, roll and cut your fondant until you have the sizes and shapes you want. When adding designs using the frosting you saved to help them stick, kind of like a glue.
10. By the time you are done you will be covered in powdered sugar, but you will be in love with the end results!
Happy baking and decorating!


.JPG)
.JPG)
.JPG)
.JPG)