Thursday, August 30, 2012

Painting Laminate - End Table

I have been in search of a cute end table for a while...I wanted something more unique than a $10 Ikea table so I searched the classifieds. I found this dresser for $5, unfortunately it had a laminate finish, but I decided I could work with that. After a little anxiety at points thinking there was no way the end product would look good I am surprisingly happy with the end result.

 Supplies:
  • Furniture of choice
  • 1-2-3 Primer...this means no sanding...seriously!
  • Paint color of choices
  • Cabinet roller
  • Paint bruches
  • Paint tray
  • Protective cloth

1. Dust off your piece. Take draws out and paint the whole thing with primer. It is a little tedious if you have some grooves like I did. I ended up doing two coats of primer. Let it dry for the specified time (ok maybe I didn't wait that long, but hey it still worked!)


2. Yes Dr. Pepper was apart of my supplies...Next is the fun part, applying your color. Be patient! Due to the laminate finish you are going to need to do multiple coats...and by multiple I did about 6, make sure you let the paint completely dry between coats! Let it dry after the last coat and place for all to see! It is such a great way to add a pop of color to your room!

3. It really is pretty easy, you can also do the same thing with spray paint primer and color, but using the flat paint gave me a more rustic looks rather than a glossy look that you would get with the spray paint.

Tuesday, July 10, 2012

Mini Cheesecakes

I love cheesecake! I have seen some recipes for individual mini cheesecakes and have tried some out. I can't say I completely loved everything about one specific recipe so I decided to combine and adjust multiple recipes.

Supplies:
  • 1 Packet of Graham Crackers
  • 3 tsp butter
  • 16oz Cream Cheese
  • 2 Eggs
  • 2 Tbs Flour
  • 3/4 Cups Sugar
  • 1/4 tsp Baking Powder
  • 1 Tbs Lemon Juice
  • 1 1/2 tsp Vanilla Extract 
  • Cupcake Liners
  • Fillings of your choice (fruit, cream, caramel, pie filling)


  1.  Put one packet from your box of Graham box in a zip lock bag. Use a rolling pin to crumble the crackers. 
  2. Once crumbled put the crackers in a bowl, melt the butter and mix. The cracker crumbs should start to clump together.


3. Put your liners in your cupcake tin. Line the bottom of each liner with a layer of the cracker crumbs. Using a spoon press down the crumbs so they stick together and to the bottom of the liners.

4. Using an electric mixture cream together the Cream Cheese and Sugar.

5. Add flour and baking powder and continue mixing.

6. 1 at a time at your eggs, lemon juice and vanilla.

7. Mix for 5-7 minutes on high. You will want to make sure you mix the mixture really well so you   aren't left with clumps of Cream Cheese.
 8. Fill each liner all the way to the top with your mixture. Don't worry about it rising too much. Once it has cooled down it will dip in the middle.

9. Cook on 375 F for 18 minutes or until a toothpick comes out clean. The longer you cook them the deeper the dip will be when it cools.

10. Let the cheesecakes cool completely and put in the fridge for a few hours.
 11. Fill the  cheesecakes with your choice of topping.

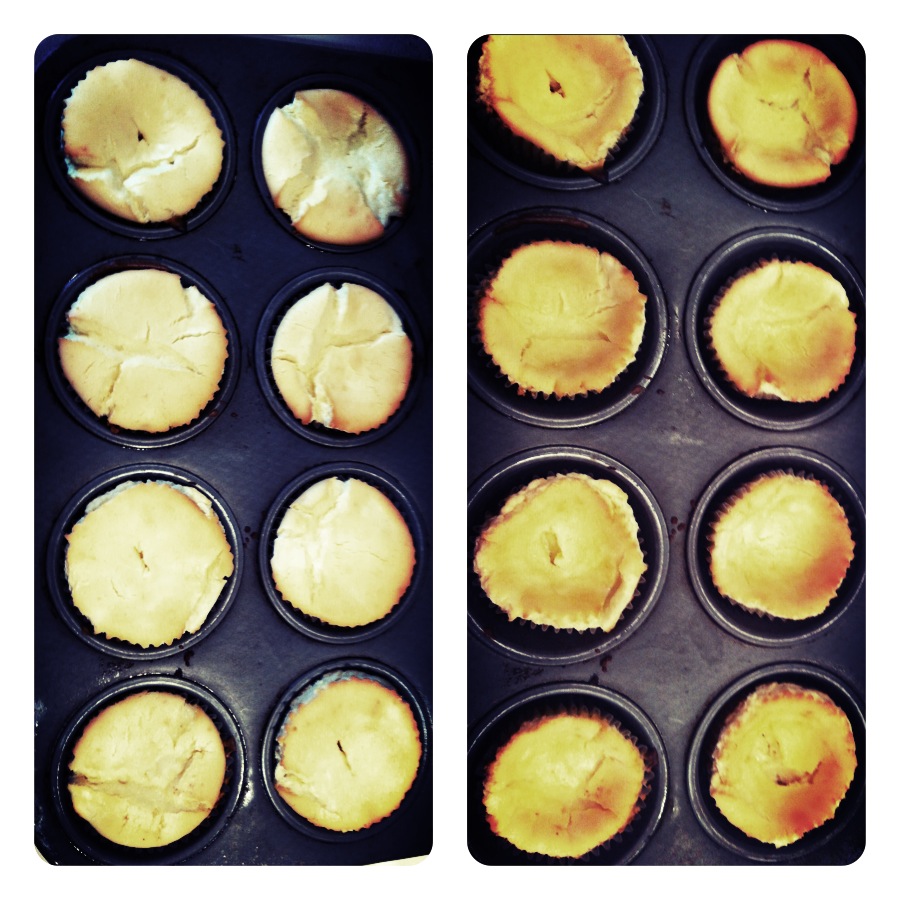
Honestly, these came out looking kind of ugly this time. I'm not sure why, but regardless of the look they are yummy, yummy, yummy! Good luck!


Sunday, June 24, 2012

Carmel Popcorn


We love us some popcorn in our family. Tonight we decided to try and make some Carmel Corn. We found our recipe at the amazing site Our Best Bites.

If you are looking for healthy, this is not the recipe for you, if you are looking for yummy, you are in the right place! 

Happy Sunday!

Friday, June 22, 2012

Princess Hat

Do you have a Princess in your life? If so, this is a simple, quick and fun craft for her. Miss L. and I completed her Princess hat in about 30 minutes this morning.

Supplies:
  • Cone (you can either buy one of these at a craft store or make one yourself)
  • Cardstock/Paper (12x12)
  • Ribbon
  • Embellishments of choice (Fabric, stickers, jewels etc.)
  • Glue/Staples/Tape

Step 1: We got some Cinderella scrapbook paper and cut out the picture of Cinderella.

Step 2: Using the rest of the paper cover the cone (you could also make the cone out of the left over paper if it is sturdy enough).

Step 3: Measure your ribbon so that it is long enough to be tied around your Princesses chin like a bonnet. Cut in two.

Step 4:Secure the ribbon on each side.

Step 4: Add embellishments. This is where we added a purple rim from foam, a cut out of Cinderella and some tassels on top.


Now you have one happy Princess!

Thursday, June 21, 2012

Bubble Art

 Another project I did with Miss L. this week was Bubble Art. She LOVES to blow bubbles and she LOVES to paint, so why not combine the two?

Supplies:
  • Bubbles (buy or make your own)
  • Food Coloring
  • Straw
  • Paper

Step 1: Mix your bubbles and food coloring

Step 2: Stick your straw in the bubbles so that you get a colored film on the end

Step 3: Blow through the straw on the paper

Step 4: Pop any bubbles that land on the paper (this was Miss L's favorite part)


Wednesday, June 20, 2012

Colored Pasta

This week I have been watching my 2 nieces. Miss L. is 3 and therefore needs a little more entertaining than Mr L. and Miss E. She loves Princesses and anything pink, she is a girl through and through. This morning we decided we would color some pasta and make some pretty necklaces.

Supplies:
  • Uncooked Pasta (we used macaroni, but you could also use penne) 
  • Food Coloring
  • Hand Sanitizer (with alcohol)
  • Zip Lock Bags
  • Thread/Twine

Step 1: Squirt some hand sanitizer into your baggie (approximately a tablespoon) and then add 3-4 drops of food coloring (you may want to add more or less depending on preference, also if you use the gel food coloring you probably won't need as much as it tends to be stronger).

Step 2: Mix the hand sanitizer and food coloring together.

Step 3: Add 1/2 cup of macaroni (uncooked)


Step 4: Shake the pasta around in the bag and knead it until all the pasta is covered in your desired color. It is not too late to add more color if needed. If you use penne, be careful not to punch a hole in the bag when kneading.

Step 5: Spread the pasta out on a surface of your choice to dry. Remember the food coloring will stain things when wet so use something old or some paper plates. Let the pasta sit for a few hours to dry.


Step 6: ENJOY! We made necklaces, but you could also use it for art or as an alternative for sand.

Monday, June 18, 2012

Pasta Fresca From Noodles & Co.


Have you ever been to Noodles & Co? If not and you have one near by go...NOW! If not you can enjoy the deliciousness of their Pasta Fresca dish in your own home with this recipe!
I get this dish every time we go and I was so happy when this recipe turned out to taste just like the real thing!

Serves 5-6 people
Ingredients:

For Pasta:
  • 16oz Penne Pasta (But any kind will work)
  • 3-4 medium sized Roma Tomatoes 
  • Baby Spinach 
  • 1 Red Onion
  • 3-4 Gloves of Garlic
  • 2 tsp Extra Virgin Olive Oil
  • Salt and Cracked Pepper (to taste)
For Vinaigrette:
  • 1/3 Cup of Extra Virgin Olive Oil
  • 4 Tbs of Balsamic Vineger
  • 4 Tbs of Sweet White Wine (We used a Chardonnay and it worked out great) 
  • 1 tsp Salt
First of all cook your pasta al dente (slightly chewy). If you are still chopping your vegetables when the pasta is cooked, drain it and cover it in cold water so it doesn't become all sticky.

Whilst your pasta is cooking you can make the Vinaigrette. In a bowl or jug mix all the vinairgrette ingredients together with a hand whisk.

Next mince the garlic, chop your onions and tomatoes. 

Heat 2 tsp of oil in a saute pan on a medium heat. Saute the garlic and then add the already strained and cooked pasta, tomatoes and onion. Saute for approximately 3-5 minutes, add salt and pepper to taste. Gradually add the vinaigrette and saute until the pasta browns a little. Add the baby spinach and saute until the spinach starts to wilt a little.

There you have it! Yummy! We served ours with breaded chicken (I didn't post the recipe because to be honest I have mastered the art of this yet and it didn't seem worth sharing) and rolls.

ENJOY!